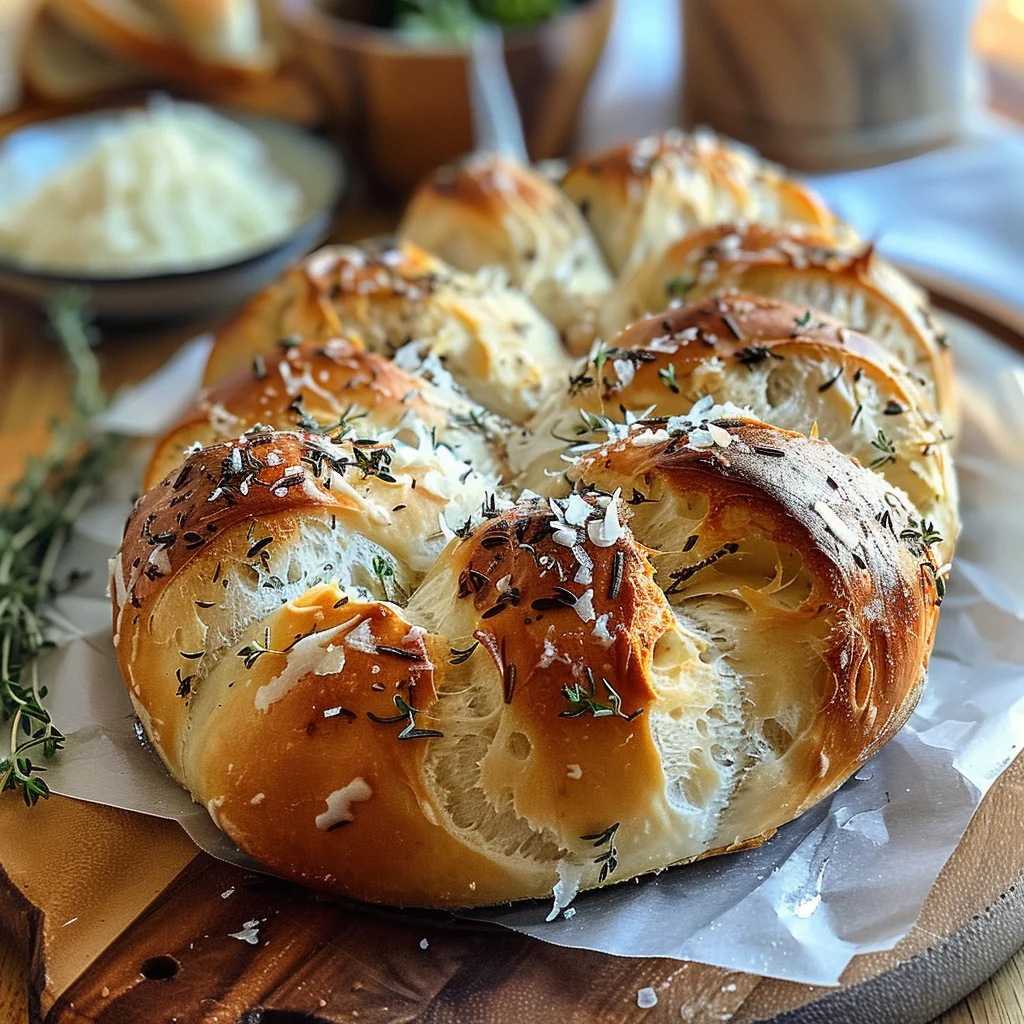
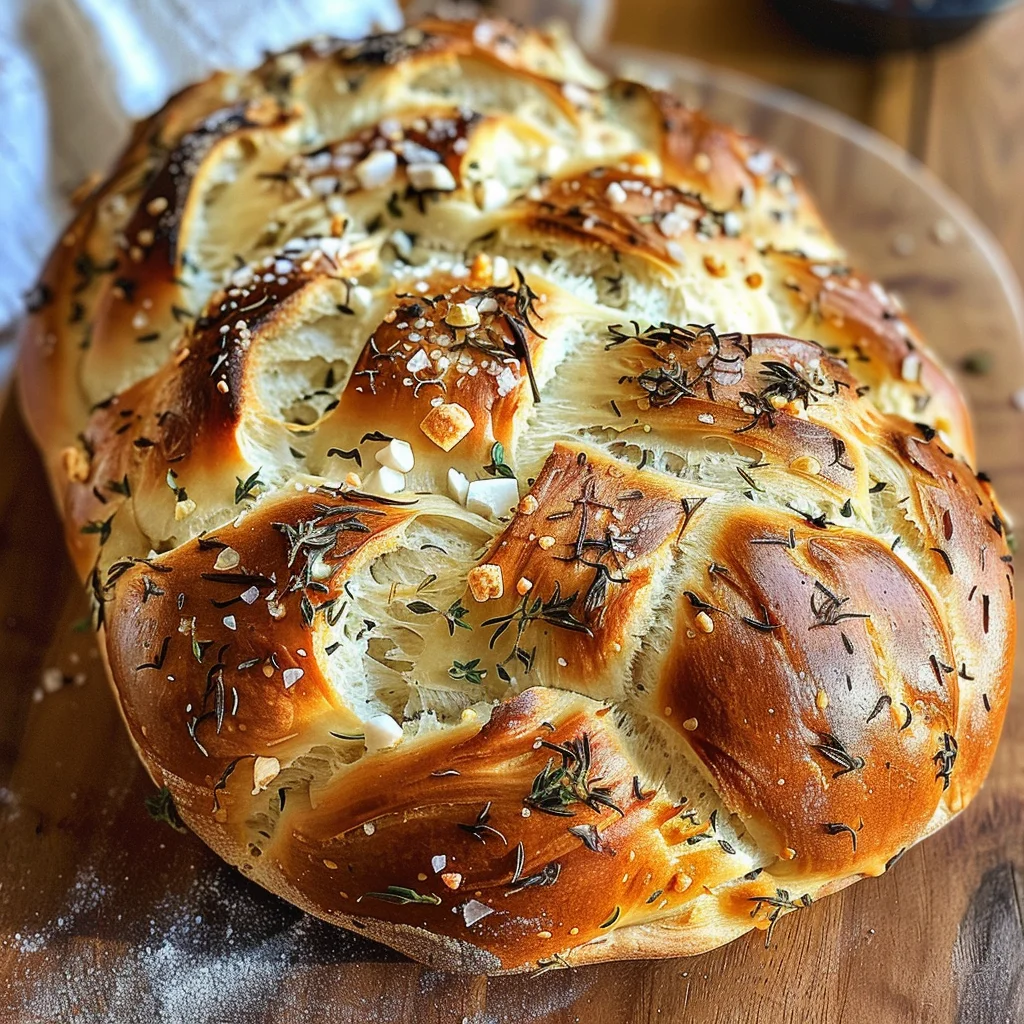
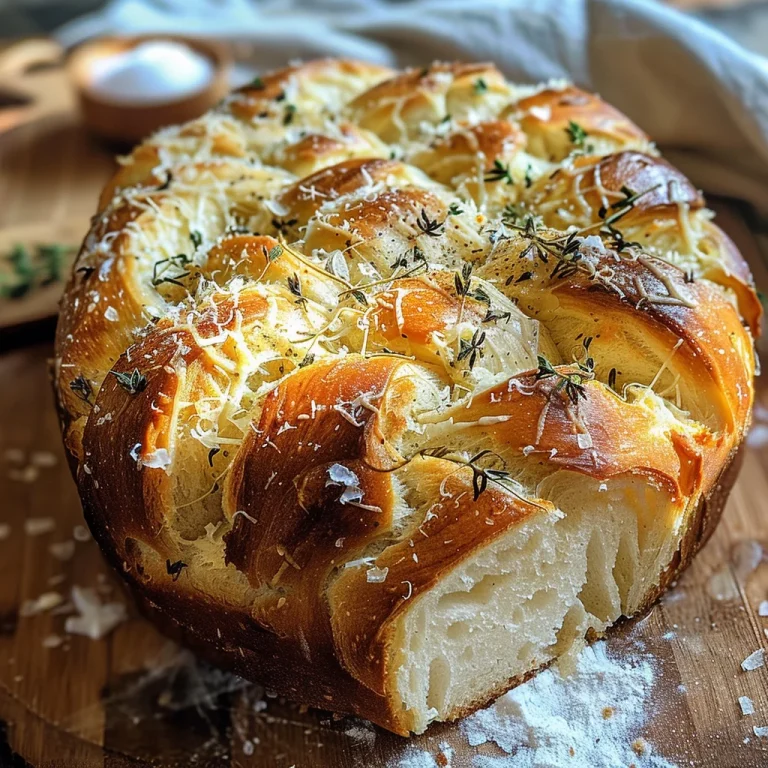
If you’re looking for a show-stopping addition to your dinner table, this Garlic Herb Braided Bread: 7 Flavorful Reasons to Bake This Stunning Loaf Today is just the ticket! It’s not only a feast for the eyes but also a delight for the taste buds. The aroma of roasted garlic and herbs fills your kitchen, making it feel warm and inviting—a perfect scene for cozy family gatherings or casual weeknight dinners. Plus, it’s versatile enough to be served alongside soups, salads, or enjoyed on its own with a drizzle of olive oil.
Baking this bread is a wonderful way to spend some time in the kitchen, and trust me, once you see how easy it is to create such an impressive loaf, you’ll want to whip it up again and again!
Why You’ll Love This Recipe
- Easy to Make: With simple steps and minimal fuss, you’ll have fresh bread ready in no time!
- Family-Friendly: Kids and adults alike will love tearing off pieces of this fluffy, flavorful bread at mealtimes.
- Perfect for Gifting: Wrap it up nicely as a thoughtful homemade gift for friends and family.
- Customizable Flavors: Feel free to get creative with different herbs or cheeses based on your preferences!
- Impressive Presentation: The beautiful braid makes it a stunning centerpiece that will wow your guests.
Ingredients You’ll Need
Gathering these ingredients is part of the fun! They are all simple, wholesome items that you might already have in your pantry. Here’s what you’ll need for this delightful Garlic Herb Braided Bread:
For the Dough
- 3 cups all-purpose or bread flour
- 2¼ tsp active dry yeast (1 packet)
- 1 cup warm water (110°F)
- 2 tbsp olive oil
- 1 tsp salt
- 1 tbsp sugar
For Flavor
- 3–4 cloves garlic, minced or roasted
- 1 tbsp dried mixed herbs (oregano, thyme, basil) or 2 tbsp fresh
- ½ cup grated parmesan cheese
- ¼ tsp red pepper flakes
Toppings
- 1 tbsp melted butter (for brushing)
- 2 tbsp shredded mozzarella
- 1 tbsp fresh parsley for garnish
Variations
This recipe is wonderfully flexible! You can easily adapt it based on what you have on hand or your personal taste preferences. Here are some fun ideas:
- Herb Swap: Use different herbs like rosemary or dill for unique flavor twists.
- Cheese Lovers: Add more cheese varieties—try feta or cheddar for extra richness.
- Vegan Option: Substitute nutritional yeast for parmesan and use plant-based butter.
- Spicy Kick: Mix in some diced jalapeños or extra red pepper flakes for heat!
How to Make Garlic Herb Braided Bread: 7 Flavorful Reasons to Bake This Stunning Loaf Today
Step 1: Activate the Yeast
In a large bowl, combine warm water and sugar. Sprinkle the yeast over the top and let it sit for about 5–10 minutes until it becomes foamy. This step is crucial as it activates the yeast, ensuring your bread rises beautifully.
Step 2: Mix the Dough
Stir in olive oil, minced garlic, dried herbs, salt, and 2½ cups of flour. Mix until a soft dough forms. Gradually add remaining flour as needed—it should feel slightly tacky yet manageable. This ensures a light texture!
Step 3: Knead the Dough
Knead the dough by hand or with a mixer for about 6–8 minutes. Add parmesan halfway through kneading; this helps distribute the flavor evenly throughout your bread. Proper kneading develops gluten which gives the bread its structure.
Step 4: First Rise
Transfer your dough into a greased bowl, cover it with a clean cloth, and let it rise in a warm place until doubled in size—about an hour. This fermentation process enhances flavor and creates those lovely air pockets.
Step 5: Braid the Dough
Once risen, punch down the dough gently to release air. Divide it into three equal parts and roll each into long ropes (14–16 inches). Braid them together carefully—this not only looks beautiful but also helps create surface area that gets perfectly crispy when baked.
Step 6: Second Rise
Place your braided loaf on a parchment-lined baking sheet. Cover loosely again and allow it to rise for another 30–40 minutes. This second rise contributes to its fluffiness!
Step 7: Bake the Bread
Preheat your oven to 375°F (190°C). Brush the loaf with melted butter before adding any optional toppings like cheese or herbs on top. Bake for about 25–30 minutes until golden brown and fragrant—your kitchen will smell divine!
Step 8: Cool & Enjoy!
Let your gorgeous loaf cool slightly before slicing. This allows steam to escape while keeping that soft interior intact. Now comes the best part—enjoying each bite of your homemade Garlic Herb Braided Bread!
Pro Tips for Making Garlic Herb Braided Bread: 7 Flavorful Reasons to Bake This Stunning Loaf Today
Baking this stunning loaf can be a delightful experience, and these tips will help you achieve the best results.
-
Use Fresh Ingredients: Opt for fresh garlic and herbs whenever possible. This enhances the flavor profile and gives your bread a vibrant taste that dried ingredients simply can’t match.
-
Monitor Dough Temperature: Ensure that your water is warm, not hot. Water around 110°F is ideal for activating yeast without killing it, leading to a fluffy rise.
-
Knead Thoroughly: Don’t rush the kneading process; aim for 6–8 minutes. Proper kneading develops gluten, which gives the bread its chewy texture and structure.
-
Allow Adequate Rising Time: Be patient during the rising phases. A longer rise allows the flavors to deepen and helps achieve that airy texture everyone loves.
-
Experiment with Toppings: While melted butter is a classic choice, feel free to sprinkle additional herbs or cheese on top before baking for an extra burst of flavor and visual appeal.
How to Serve Garlic Herb Braided Bread: 7 Flavorful Reasons to Bake This Stunning Loaf Today
Presenting your gorgeous Garlic Herb Braided Bread can make mealtime even more special. Here are some ideas on how to serve it beautifully.
Garnishes
- Fresh Parsley: Chopped fresh parsley adds a pop of color and freshness that complements the savory notes of the bread.
- Olive Oil Drizzle: A light drizzle of high-quality olive oil enhances flavor while adding a touch of elegance when serving.
Side Dishes
- Mixed Green Salad: A crisp salad with vinaigrette balances the richness of the bread, making for a refreshing accompaniment.
- Roasted Vegetables: Seasonal roasted veggies bring out warm flavors that pair perfectly with the aromatic herb bread.
- Tomato Basil Soup: This comforting soup creates a classic pairing, perfect for dipping and savoring every bite together.
- Garlic Hummus: Creamy hummus offers a delightful contrast in texture and flavor, making it an enjoyable dip alongside slices of bread.
Make Ahead and Storage
This Garlic Herb Braided Bread is perfect for meal prep, allowing you to enjoy fresh bread throughout the week without the fuss of daily baking. Here’s how to store, freeze, and reheat your delicious loaf.
Storing Leftovers
- Store any leftover bread in an airtight container at room temperature for up to 3 days.
- For longer freshness, wrap the bread tightly in plastic wrap before placing it in a container.
- Avoid refrigerating, as this can dry out the bread.
Freezing
- Allow the bread to cool completely before freezing.
- Wrap the loaf tightly in plastic wrap, then place it in a freezer-safe bag or container.
- It can be frozen for up to 3 months. Label with the date for easy reference.
Reheating
- To reheat, preheat your oven to 350°F (175°C).
- Unwrap the loaf and place it directly on the oven rack or on a baking sheet.
- Heat for about 10-15 minutes until warmed through. You may brush it with melted butter before heating for extra flavor.
FAQs
Here are some common questions about making Garlic Herb Braided Bread.
Can I use fresh herbs instead of dried in Garlic Herb Braided Bread?
Absolutely! Fresh herbs can enhance the flavor even further. Use about twice the amount of fresh herbs compared to dried when making this delicious loaf.
How do I achieve a golden crust on my Garlic Herb Braided Bread?
To achieve that beautiful golden crust, make sure to brush the top of your braided loaf with melted butter right before baking. This will help create that appealing color and add extra richness.
Can I make Garlic Herb Braided Bread ahead of time?
Yes! You can prepare the dough ahead of time and store it in the refrigerator overnight. Just let it come back to room temperature before shaping and baking.
What should I serve with Garlic Herb Braided Bread?
This stunning loaf pairs beautifully with soups, salads, or as a standalone appetizer with dips. It’s perfect for any meal!
Final Thoughts
This Garlic Herb Braided Bread is not just a recipe; it’s an experience filled with warmth and comfort. Enjoying this gorgeous, aromatic loaf is sure to bring smiles to your dinner table or make for a thoughtful gift. I hope you find joy in making this stunning bread and sharing its delightful flavors with your loved ones!
Garlic Herb Braided Bread
Looking for a delightful addition to your dinner table? The Garlic Herb Braided Bread is a stunningly beautiful and flavorful loaf that will impress family and friends alike. Infused with the rich aromas of roasted garlic and fresh herbs, this bread is not just a treat for the taste buds but also a feast for the eyes. Perfect for cozy gatherings or casual weeknight dinners, it pairs beautifully with soups, salads, or can be enjoyed on its own with a drizzle of olive oil. With easy-to-follow steps, you’ll find baking this impressive bread both enjoyable and rewarding. Get ready to create a loaf so delicious, you’ll want to make it again and again!
- Total Time: 50 minutes
- Yield: Approximately 12 servings 1x
Ingredients
- 3 cups all-purpose or bread flour
- 2¼ tsp active dry yeast
- 1 cup warm water (110°F)
- 2 tbsp olive oil
- 1 tsp salt
- 1 tbsp sugar
- 3–4 cloves garlic, minced or roasted
- 1 tbsp dried mixed herbs (oregano, thyme, basil) or 2 tbsp fresh
- ½ cup grated parmesan cheese
- 1 tbsp melted butter (for brushing)
- 2 tbsp shredded mozzarella
- 1 tbsp fresh parsley for garnish
Instructions
- Activate the yeast by combining warm water and sugar in a bowl; sprinkle yeast over top and let sit until foamy (5–10 minutes).
- Mix in olive oil, garlic, herbs, salt, and flour until a soft dough forms.
- Knead the dough for about 6–8 minutes, adding parmesan halfway through.
- Let the dough rise in a greased bowl until doubled in size (about 1 hour).
- Punch down the dough and divide it into three parts. Roll into ropes and braid them together.
- Allow the braided loaf to rise again for 30–40 minutes.
- Preheat oven to 375°F (190°C), brush with melted butter, add toppings if desired, and bake for 25–30 minutes until golden brown.
- Let cool slightly before slicing and enjoy!
- Prep Time: 20 minutes
- Cook Time: 30 minutes
- Category: Bread
- Method: Baking
- Cuisine: American
Nutrition
- Serving Size: 1 slice (50g)
- Calories: 150
- Sugar: 1g
- Sodium: 180mg
- Fat: 4g
- Saturated Fat: 1g
- Unsaturated Fat: 3g
- Trans Fat: 0g
- Carbohydrates: 24g
- Fiber: 1g
- Protein: 5g
- Cholesterol: 0mg